Installation guide for Hydrogel Screen Protectors.
To install your new hydrogel screen protector at home, you will need the following items:
- A flat plastic card, such as a credit card.
- A grippy surface, such as a rubber mat.
- A microfiber cloth to clean the screen
Hydrogel Screen Protectors come as a 3 layered item:
- The bottom alignment opaque layer.
- The Hydrogel protector.
- The top plastic dust cover.
Following this guide, you will end up removing each outside layer in sequence, leaving you with a Hydrogel Protector on your device with no air bubbles. There are pictures to guide you, plus at the bottom of this page you will find the video guide by the manufacturer to aid you.
Step 1) Place your mobile phone on the rubber mat, screen facing upwards, and clean the screen to remove any dust or fingerprints from the glass.
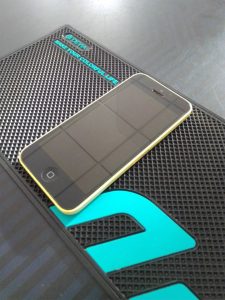
Rubber Mat
Step 2) With the opaque alignment layer on the bottom, place the protector onto the glass of the device, making sure to align any speaker holes, home button holes, or camera holes with the corresponding section on the device.
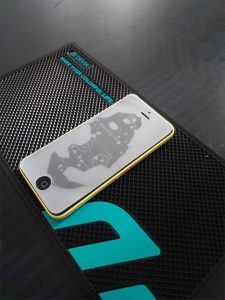
Hydrogel Placed
Step 3) There will be a split in the middle of the alignment layer, pull all three layers back up to the split.
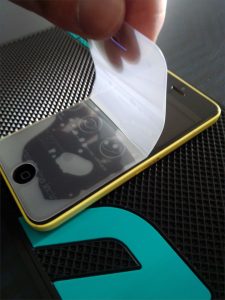
Peel back to the split
Step 4) Using a flat edge, such as the credit card, gently push forward at the seam, to slide the alignment layer off whilst adhering the hydrogel protector onto the device screen.
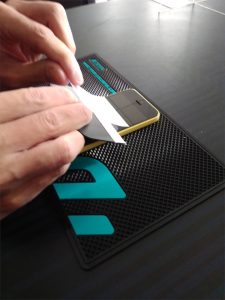
Pushing forward the alignment layer
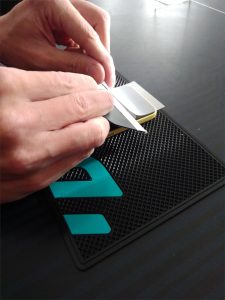
Alignment nearly off
Step 5) Flip the phone around, and repeat step 4.
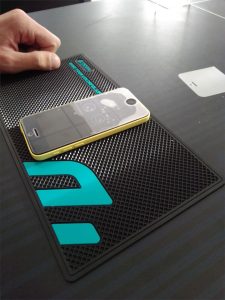
Flipped over
Step 6) Remove the top plastic dust cover.
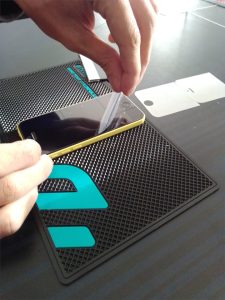
Dust Cover removed